Monday, March 29, 2010

My Mom

This is the hardest blog post to write.  I just wanted to share with all of you that on Sunday, March 21, at 5:28 p.m. my Mom passed away.  

She was at home and I held her as did my brother and sister as she drew her last breath. 

Scan

I love and miss you  so much Mom.

Thank you all who have prayed for my Mom and my family. 

Gail

Thursday, March 18, 2010

Please Pray For My Mom

I just wanted to share with all of you why I haven’t been blogging.  Three and a half years ago, my Mom was diagnosed with lung cancer.  Three weeks ago we found out that the cancer has now spread to the liver, back and spine.

I know God knows best for my Mom and He will take care of her, but I am not ready to let her go.  She is the heart and soul of our family.  We lost our Dad four years ago and that was hard.  You would think that would prepare you for the time when your Mother will join her husband in heaven, but it doesn’t.

Please pray for my Mom so her journey will be a painless reunion with God and my Dad.

Image020 (2)

Gail

Thursday, February 18, 2010

Cloche Party!

Marty at A Stroll Thru Life is having a Cloche Party and I’m so excited.  This is my very first one!  I have visited Marty’s  Cloche Parties before and was so inspired by all the participants’ cloches that I wanted to start collecting a few. 

Under  my first cloche I’m about to show you,  is a bird’s nest that was in a tree in our front yard.009

I added moss and eggs to the nest.  I made a tag and tied it on with jute string.  The tags says “Bless Our Nest”.  I wanted to keep it simple.054

This cloche has found it’s home in our kitchen entry way table.  017

My second cloche I kept  simple as well.  I just added  decorative orbs.072

Both of my cloches were thrift store finds.  069

This cloche is in my dining room on the side table.  075

Thanks so much for coming by and I hope you enjoyed my cloches.    Be sure to check out Marty’s cloches and all the other participants because you will be inspired! 

Gail

Tuesday, February 16, 2010

Chair Back Covers

I would like to thank all of you for leaving such sweet comments about my dining room tweaking.  A few folks inquired about how I made my chair back covers, so I thought I would share with  you how I made them. 

First, I measured the back of the chair to determine the width and length I needed.  005 

Allowing for a seam allowance, I cut my fabric.   In the picture below you can see where I ironed my fabric before sewing because I wanted to make sure when I turned my ends to make a point, it would be even.  046

Instead of sewing you could very easily use iron on tape but I wanted to try out my new sewing machine.   008

I sewed three sides and then turned up my ends to make a point.  I used iron on tape at the top to secure the point.  Then attached the trim.   See picture below.  016

Using my Cricut, storybook cartridge and Heat n’ Bond  I made an “F”.  048

Next, I peeled the Heat n’ Bond paper off the back of the “F”. 049

Then I placed the “F” on the front of the chair back cover and ironed it on.  050 

There you have it……a Mon0grammed Chair Back Cover.     112

I hope this all made sense to you.  If you have any questions, please email me or leave me a comment. 

Gail

Monday, February 8, 2010

Tweaking the Dining Room

I’ve been busy tweaking a few things in the dining room.  It’s hard to believe that just five months ago my dining room looked like this.  You can read about the transformation of the dining room here.

002 - Copy (2)

I don’t know about you but my “Things to Do” list must be a mile long.  On my list were few things I wanted to do in the dining room.    One was to change the window treatments and two was to make chair covers for two of the dining room chairs.  

Below is a before picture of the window treatment I had in the dining room.  It’s hard to see but the valance was gold with a green stripe  and a small hint of red in the green stripe.   Behind the valance are gold sheer panels. 009

Now a picture of the after, I chose a red valance with a touch of gold and used white sheer panels.  What a difference!  It makes the room so much brighter.    012
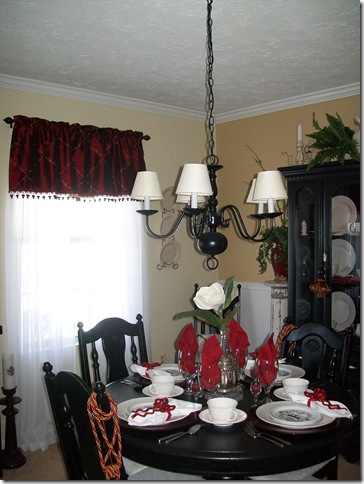
My original thought was to make chair covers for two of the chairs in the dining room but I opted for something a little more simple.  I made monogram chair back covers and  small pillows instead.     112

One view with one of the chairs.  037

018

And another view with the other chair.  002

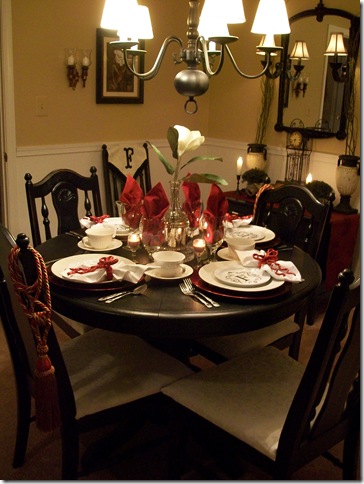
The tablescape in the dining room.   124

I’m lovin’ all things red and monogrammed right now!  123

I used my wine decanter for a vase.  020

I love the little goblet candle holders.  044

The vignette on top of the china cabinet were all auction, yard sale and thrift store purchases.  027

Now I can check off my list the dining room and on to  other “Things To Do”.

Gail

P.S.  I’m linking this post to Finding Fabulous for Frugalicious Friday, My Romantic Home for Show and Tell Friday and Poppies at Play for Creative Cats.  Thanks ladies for hosting such a fun linky party.

Wednesday, January 27, 2010

Shhhhh It’s A Secret!

This part is NO secret, I  have five very special men in my life; my husband, my son and my three  grandsons.  Two of which will be celebrating birthdays tomorrow, January 28th, my husband and my youngest grandson.  It’s hard to believe that a year has past since God blessed us with a miracle of our third grandson, giving Charlie a birthday gift from heaven.  

Now this is the secret, I had been trying to figure out what I could get Charlie (my husband)  for his birthday and I’ve come up with two things.   We are BIG time hockey fans and I was able to purchase him tickets to a Washington Capitals game. 036

What a big game this will be.  They are playing the  Pittsburgh Penguins who are the Stanley Cup Winners from last year……….GO CAPS! 

Now for the 2nd gift which I made and it comes  from my heart.  

I used a  12x12 canvas and  painted it  black.   In case you’re wondering, this is not the gift.  I brought this canvas at a yard sale back in the summer.  019

I used my Cricut and scrapbook paper.014

A metal frame.032

And this is the gift from my heart!  028

Now I have to tell you, my husband is my biggest blog fan so I’m hoping that I am able to sneak this post in otherwise it will be NO Birthday surprise tomorrow! 

Gail

I’m posting this to It’s So Very Cheri for Celebration.  Thanks Cheri for hosting such a fun party!

Sunday, January 24, 2010

I Made Another Monogrammed Wreath

I loved my Christmas monogrammed wreath so much that I made another one to replace it.   To see my Christmas Monogrammed Wreath you can go  here

I started out  basically the same way I did my Christmas wreath.  I used my Cricut and the Story Book Cartridge to make my “F”.   By the way, I love this cartridge!  005

I traced the letter on luan board and cut it out using my skrol saw.009

The finished “F” cut.     Now ready for painting.   011

I painted it  and then decided I wanted to add some texture to it so I put Mod Podge  on it and sprinkled white glitter.  After it dried I repainted it again.004

Now onto the wreath part.  I wired two wreaths together and hot glued eucalyptus stems covering the whole wreath.  I added some hydrangea and wired my “F” on.  026

Before I show you the finished wreath, I wanted to use this lamp on a pedestal table that sits under the mirror in our foyer, but I felt the gold needed to be toned down a bit.025

I used a sponge brush and dabbed  paint on the lamp using the same color I painted the “F” and bought a new globe.   032

The lamp sits on a family history book that was written in 1967 about my husband’s family.  039

I really like it!  I had a lot of compliments during the holidays about the Christmas Monogrammed Wreath and I’m getting the same feedback regarding this one.  013

 015

I’m working on a pillow for the chair beside the table using my Cricut.  I’ll be sure to post about it when I’m all done.  I’m lovin’ my Cricut. 

Gail

P.S.  I’m linking this post to A Picture is Worth a 1000 Words for 2nd Time Around Tuesday, Reinvented for Trash to Treasures and Today’s Creative Blog for Get Your Craft On.   Thanks ladies for hosting such a fun party.  

Related Posts with Thumbnails